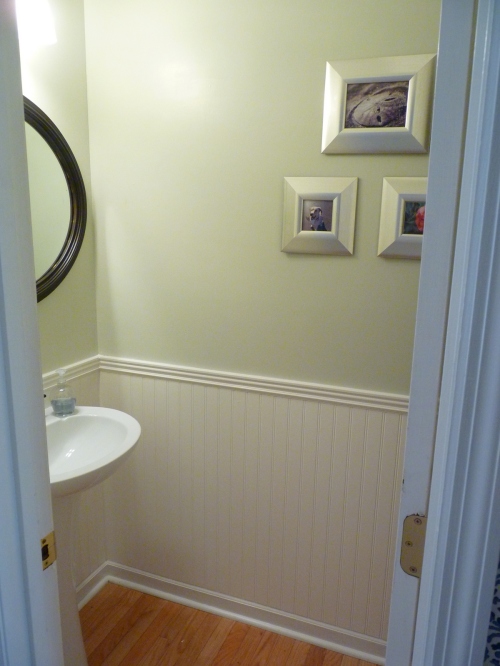
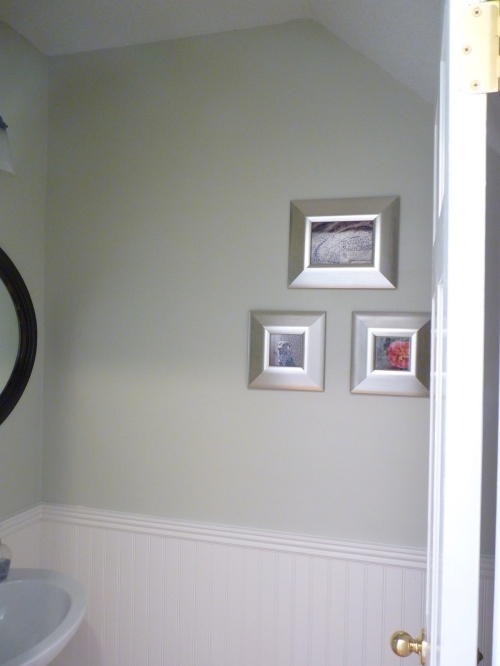
The past few weekends we’ve been true Weekend Warriors. The opponent? Our out-of-date powder room. I’m happy to report that we came out victorious:


Not only was the half bath aesthetically transformed but it was all accomplished for under $100! Here’s how we got from Point A (circa 1985) to Point B (totally 2011).
First, let’s dissect the “before”. The color of the paint and the quality of the paint job are not truly conveyed in these photographs. Utterly awful. I have nothing against green. In fact, it’s my favorite color. Just not this green. Hunter green. Soooo dark. There were drips, missed spots, and uneven lines all over the place. Not to mention that this room is quite small and located under the stairs, making it feel like you were walking into a dark dungeon. In addition to the paint color, the finish of every single fixture in the room was GOLD. Bling bling, baby. The light fixture, mirror, faucet, towel holder, toilet paper holder, wall plates- all shiny gold. I guess the previous owner gets style points for matching but it definitely was the style of another era. I thought since it was such a small space that it would be relatively easy to transform. I didn’t realize at the time that a small space meant it was super hard to maneuver AND all of the details had to be perfect since all my mistakes would be up close and personal once you set foot in the door. Ugghhh. But well worth it.


I spent hours online and in stores looking at light fixtures and faucets to replace the gold ones. Everything was so expensive! Any simple light fixture I liked- easily more than $100. And I can’t believe the price of the cheapest looking sink faucets! So I decided to take a chance and try something risky- spray paint. It could have turned out really really bad. But I figured I had nothing to lose besides the $6 for the spray paint since I was going to have to replace the fixtures anyways. However, the light fixture just wouldn’t work. The entire style of it was just wrong. 1985 called, it wants its light fixture back:

So it got booted. Oh and look, before the hunter green explosion the bathroom was Pepto pink! How charming.

The last time I was at the Habitat for Humanity ReStore I picked up a new light fixture for $10…glass shades and all! It was that shiny chrome finish (unfortunately I don’t have a before picture) but I quickly changed all that with this, my new best friend:


I decided on an oil rubbed bronze finish since the rest of the room was going to be so light. That spray paint is amazing….in person it really looks like the real thing! I’m interested to see how it holds up over time but for the $6 investment I think it’s already paid for itself ten times over.
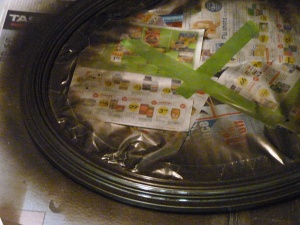
Here are the other pieces (mirror, faucet, & tp holder) getting a new finish. I made sure to protect everything I didn’t want splatter on.


I’ve been dying to add beadboard or wainscoting somewhere in the house and this bathroom seemed like the perfect place to start. It’s so small that I figured it wouldn’t be too expensive or time-consuming. We picked up five of these faux beadboard sheets at Lowe’s for $9.88 a piece then proceeded to use construction adhesive and finishing nails to put it up. A nail gun would have been soooooo handy for this but we weren’t about to buy one for a single project.


The beadboard panels were then topped off with molding.

Any gaps, seams, or nail holes were then caulked over and everything painted white (Dove White in semi-gloss) for a seamless finish. The upper wall color is Tea Stain by Valspar color matched to Sherwin-Williams Duramax paint.


Breakdown of cost:
Beadboard panels & molding: $70
Upper wall paint: $0 (leftover from hallway/stairwell project)
Lower wall/trim paint: $0 (leftover from living room trim & china cabinet)
Oil-rubbed bronze spray paint: $6
Finishing nails: $0.99
Construction adhesive: $5
Caulk: $0 (leftover from another project)
Light fixture: $10
Welcoming our bathroom to the 21st century: Priceless
Grand total = approximately $90
Not bad, eh? I’m proud of our little bathroom now. Sometimes I walk past it and pause to admire our hard work : ) An added bonus was that I put the finishing touches on it literally hours before we threw a Superbowl party so I was able to show it off! Score! Sorry about the pun, haha. Oh and I have to give Bob credit for all of the cutting. He got to use multiple power tools to slice and dice the molding and beadboard into place. Thanks, hun.

It looks fabulous, I’m in awe. The only thing I’d do differently is also match the picture frames to the mirror etc (or vice versa) but then I’m not exactly known for my decorating eye 🙂
By: Nicky at Not My Mother on February 10, 2011
at 5:53 pm
Beautiful! And love your title, too!
By: Cathie on March 22, 2011
at 2:07 pm
It looks wonderful, you guys did a great job. I’m impressed that you started and finished in one weekend. And I’m super impressed that you painted your faucet and I’d love to know how that holds up. Like you said, you can’t lose. I’ve painted a bathroom countertop we couldn’t afford to replace with spray paint made for plastic and it’s held up surprisingly well.
By: Patsy on March 22, 2011
at 2:09 pm
That’s an amazing transformation! Spray paint has definitely come a long way!
By: Charisa on March 22, 2011
at 3:08 pm
I’m in the process of spray painting a mirror with ORB and cannot figure out how to protect the actual mirror from the spray, yet still get the inside corner of the frame?? Please tell me how you did this!
By: krista on March 22, 2011
at 5:58 pm
Hey Krista,
Since the mirror was round it made the process a little more tedious. I just layered newspaper many times over and taped all around the border with Frog Tape (the green painters tape). In some places on the mirror I was able to slide a corner of the newspaper under the frame to ensure the mirror itself was covered.
Hope that helps! You can always touch up any missed spots on the inside of the frame after the fact with a small brush but you can’t really remove the spray if it gets on the mirror, so cover cover cover!
By: diywannabe on March 23, 2011
at 1:22 pm
the only thing i would change is to spray paint the toilet flush handle the oil rubbed bronze. other wise great job!
By: paige on March 22, 2011
at 11:33 pm
What a great idea to spray paint your faucet! I’m thinking of trying this now on our light fixture in our bathroom before we replace it just to see if we can get it to last a little longer until we can save up for the fixture we REALLY want!
Thanks for the tip!
By: Jen on March 23, 2011
at 10:41 am
So glad I stumbled across your post! Your bathroom looks wonderful. We are in the middle of fixing ours up – I have all new oil rubbed bronze faucets- and a satin nickel light fixture 😦 So I bought that exact same spraypaint and have been waiting for a warm day to use it (hasn’t happened in MN yet). I was kind of scared of how it would turn out, but not anymore – your pics look great!
By: ArtsyNina on March 23, 2011
at 10:32 pm
OMG! I was just looking at our old, very-very old, faucets today and I wondered if I dare spray paint them ORB. And here you are! I’m assuming it worked okay and didn’t rub off. You didn’t prime them first or anything? Sorry, if I missed it. I was too excited to see it.
Oh, and fabulous makeover! What a difference!
By: ColleenwithMurals&More on March 23, 2011
at 11:08 pm
No priming required! This spray paint really sticks to everything. I started to scuff up the tp holder with a sanding block prior to spraying anything but quickly realized I was just scratching the finish. So far, so good on durability too!
By: diywannabe on March 24, 2011
at 8:54 am
What a great transformation! I’m redoing a smallish bathroom right now, too, and have those horrible gold fixtures. I would like chrome or silver, though, so I’m not sure spray paint would look as great in those colors as yours does. Great job, and I especially love the bead board and color of the walls!
By: Vicki V on March 24, 2011
at 7:46 am
Wow! I.am.loving.it!!!! I have a powder room that is exactly the same set up with exactly the same sink. It’s attached to the wall, correct? How difficult was it to work around the sink – i.e. where it’s attached to the wall, and the places where the water goes into the wall? Tips/tricks?
Awesome job!
By: Mindy on March 24, 2011
at 2:47 pm
Great job! Our home was built 17 years ago and that “bright” brassy gold was the style. I have been wanting to change ours also, but I think I will try to spray paint also. Thanks for the encouragement! I’m interested in the beaded panels too; maybe I can talk my husband into doing that project with me! You did awesome!
By: Paula on March 24, 2011
at 7:24 pm